...
- Create a new repository on Bitbucket / GitHub
- Bitbucket:
- Go to https://bitbucket.org/
- If you need to log in, get the login credentials from LastPass.
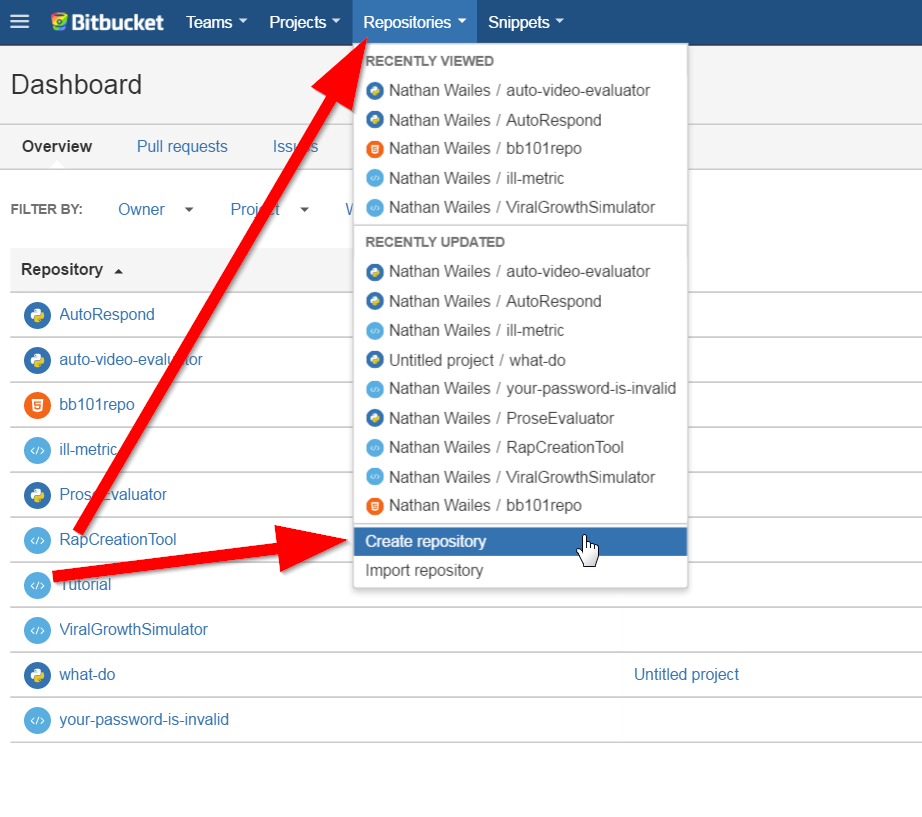
- Click 'Repositories' and then 'Create repository'.

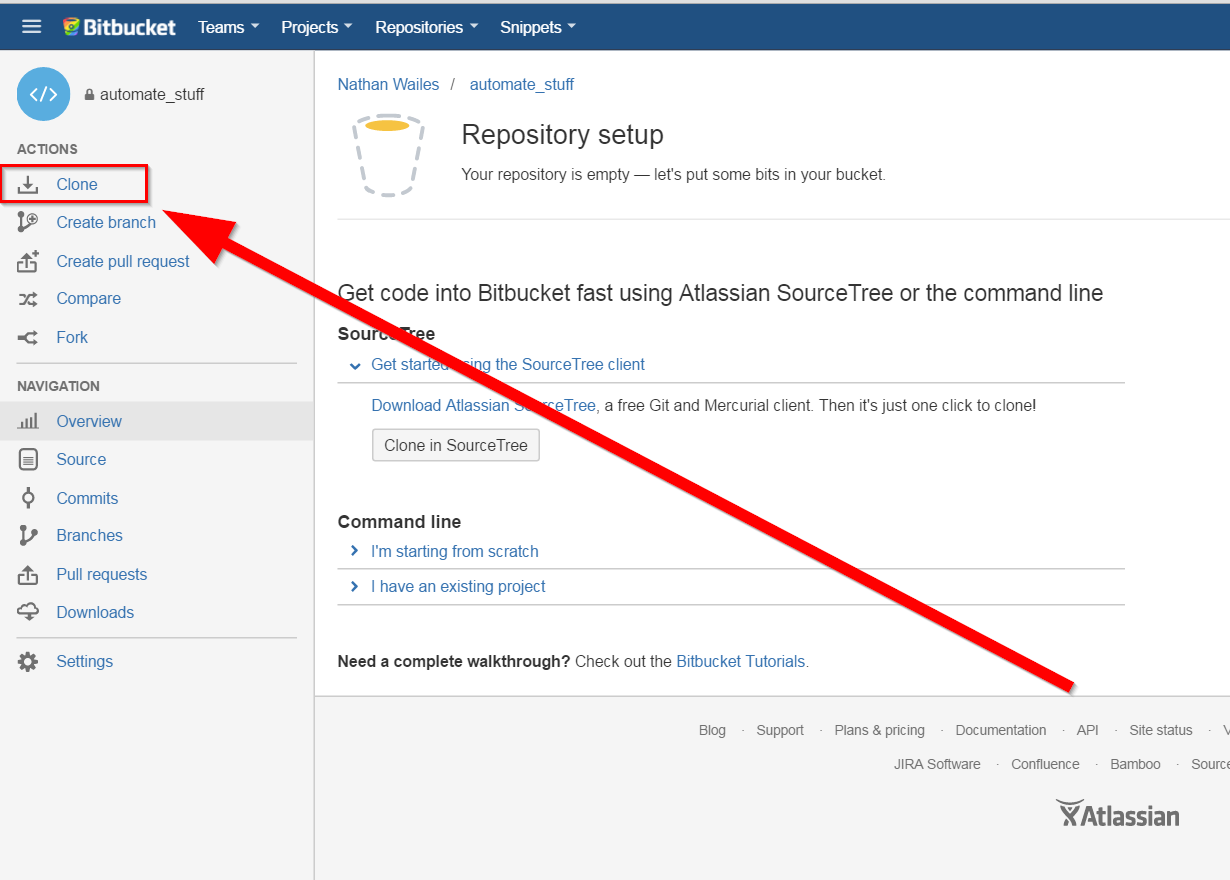
- After you pick a name you'll be presented with a new screen.
- Click "Clone".

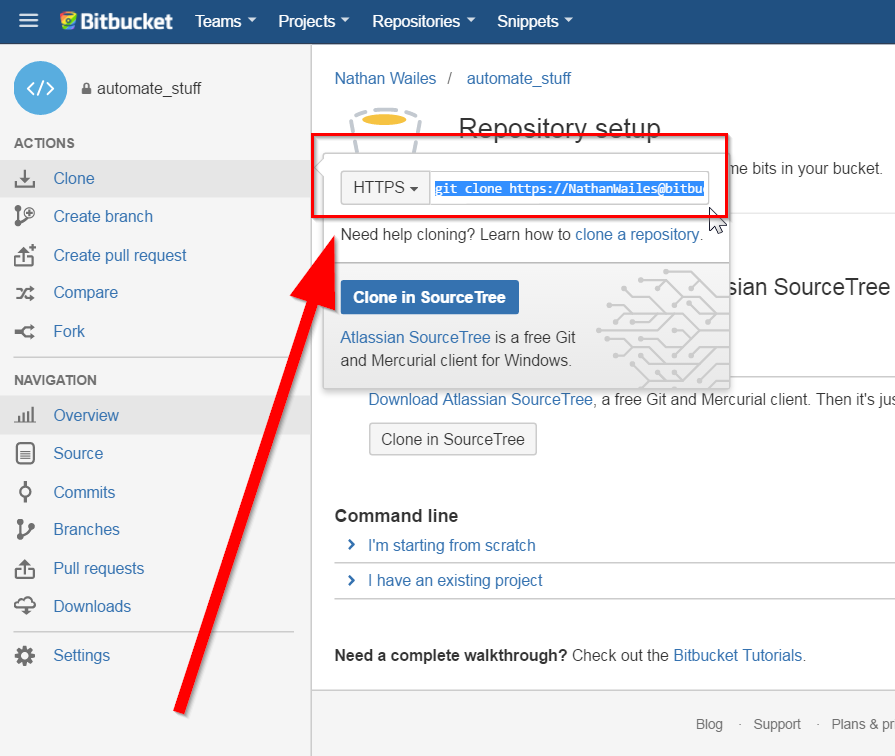
- Go to https://bitbucket.org/
- Copy the command it shows you.
 Switch to PythonAnywhere's website
- Bitbucket:
- Create a new bash console.
- If you're not already in the root directory, type "cd ~" and hit enter.
- Take the command you copied from Bitbucket and paste it into the console and hit "Enter".
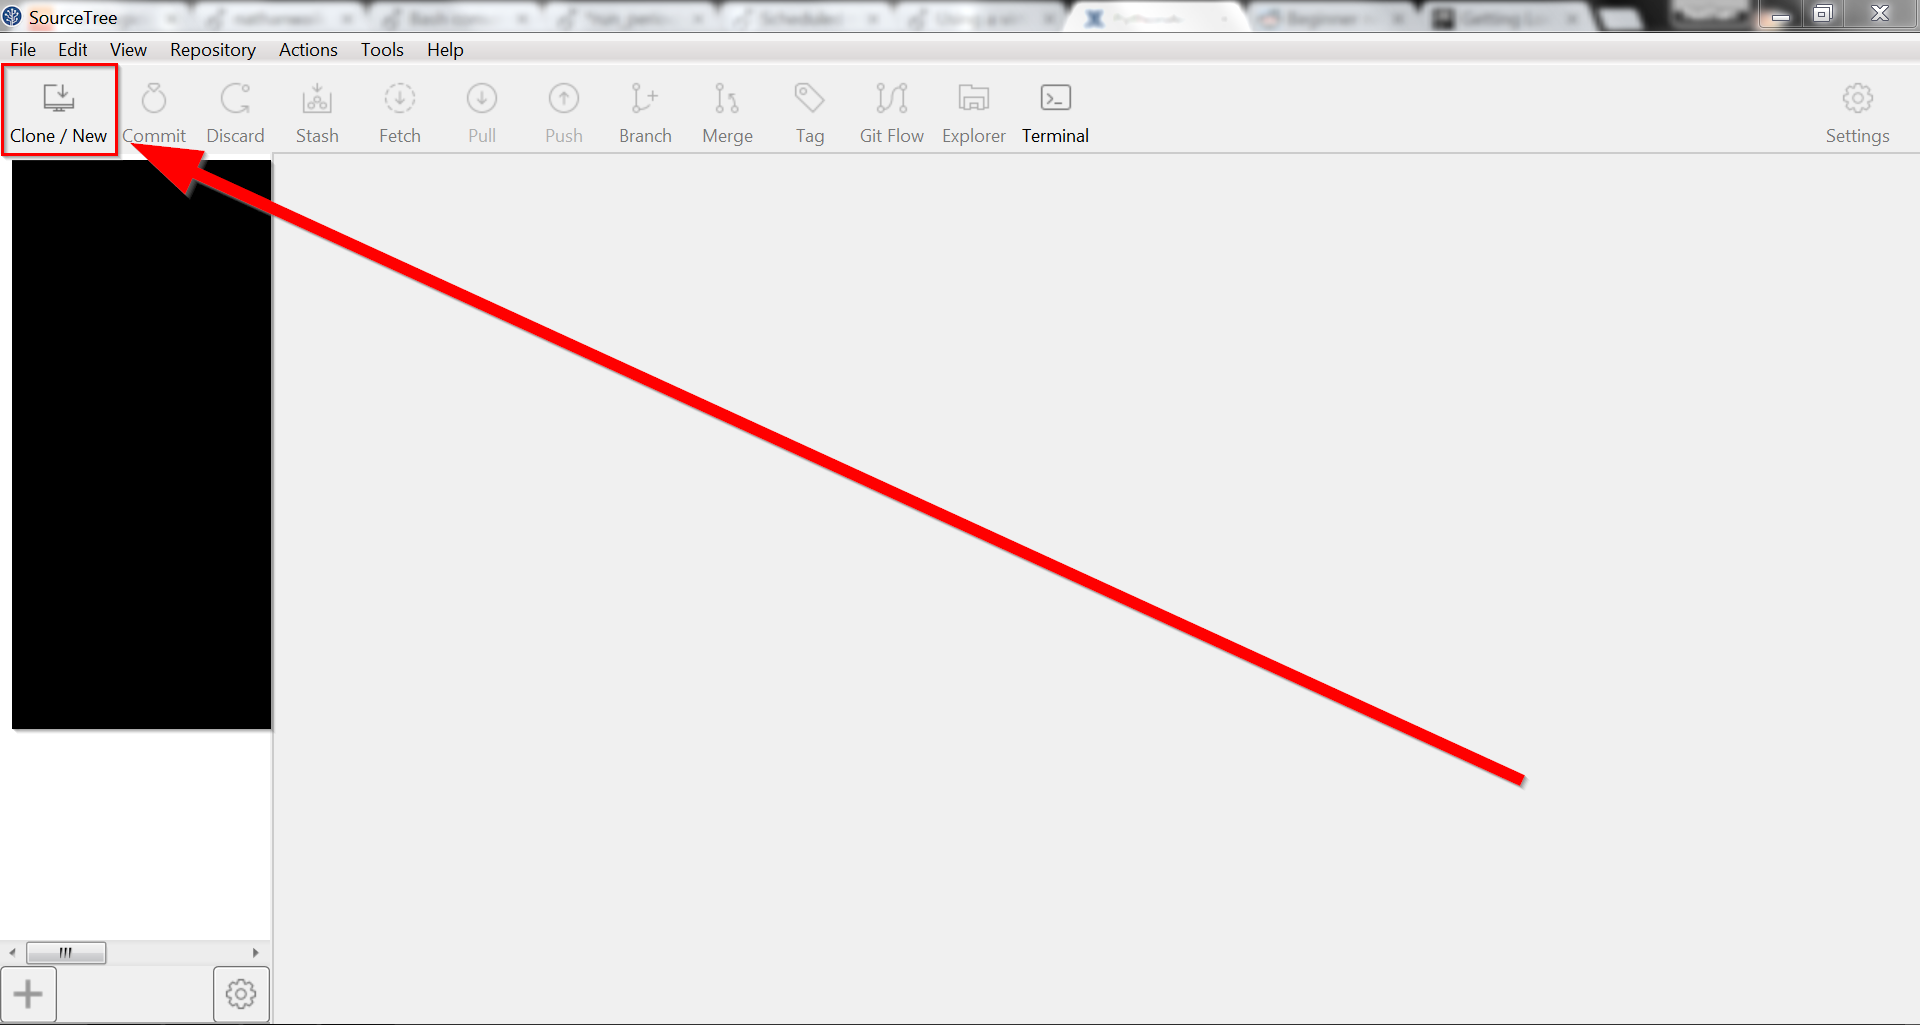
- Open SourceTree (it's software you keep on your computer).
- Click 'Clone'

- A dialog box will pop up. Click the button on the top-right to be shown a list of your online Bitbucket projects.
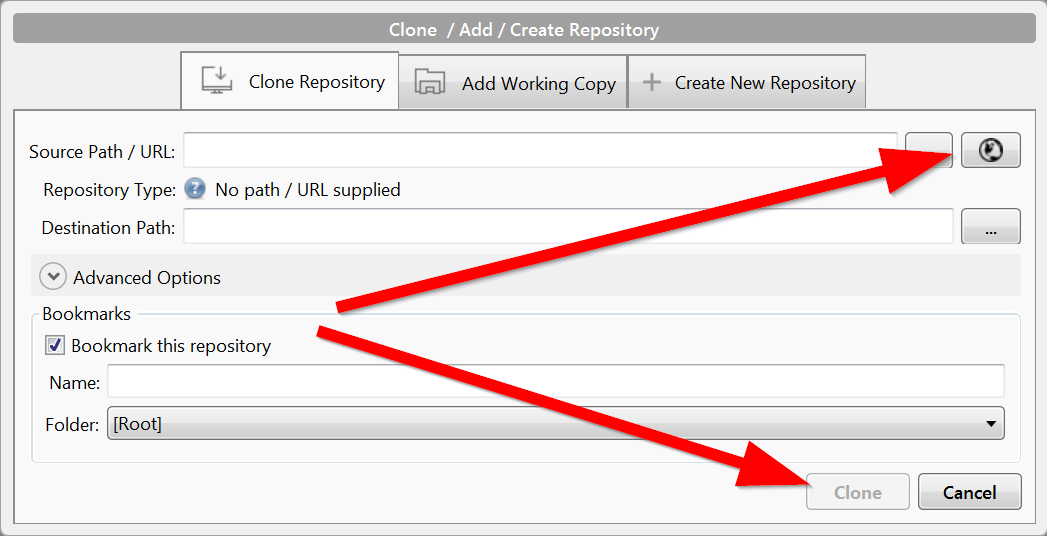

- When you've selected it, the only thing you should have left to click is "Clone".

- Navigate to the folder.


- Click 'Create'.


- It'll ask you if you want to create the project from existing sources. Click 'Yes'.


- With the project open, go to 'File' → 'Settings'

 Navigate to "Project: project_name" → "Project Intepreter"


- Location:
- Navigate to the project folder.


- Navigate to the project folder.
- Name: Once you've selected the project folder, type 'venv' in the 'Name' field. This will create a new folder named 'venv' in the project folder.

 Base interpreter: I'm guessing it's probably a good idea to set the base Python interpreter to be the same version as that used on PythonAnywhere.
- To get the version used on PythonAnywhere, I start a Python session.


- To install that version of Python, just go to the main Python website.


- When it's installing, I made a note of the directory it was installed to.
- The 'AppData' installation directory didn't show up in PyCharm because it's hidden.


- ...so I navigated to the directory in Windows Explorer and copied the path.


- I then copied that path into PyCharm and added '/python.exe' to the end, and it found the file.


- Explanation:
- We're doing this so that we can have our (not-yet-created) PythonAnywhere virtualenv download the necessary packages.
- Step-by-step instructions: (You can find official instructions here.
 )
)- Set up PyCharm to start the virtualenv every time you start a Terminal session.
- On the left-side folder-view pane, navigate to 'your_project/venv/Scripts/activate.bat', right-click the file, and select 'Copy Path'.

- Go to File → Settings → Terminal → 'Shell path' and add "/K path/to/activate.bat" after the "cmd.exe". (Source)
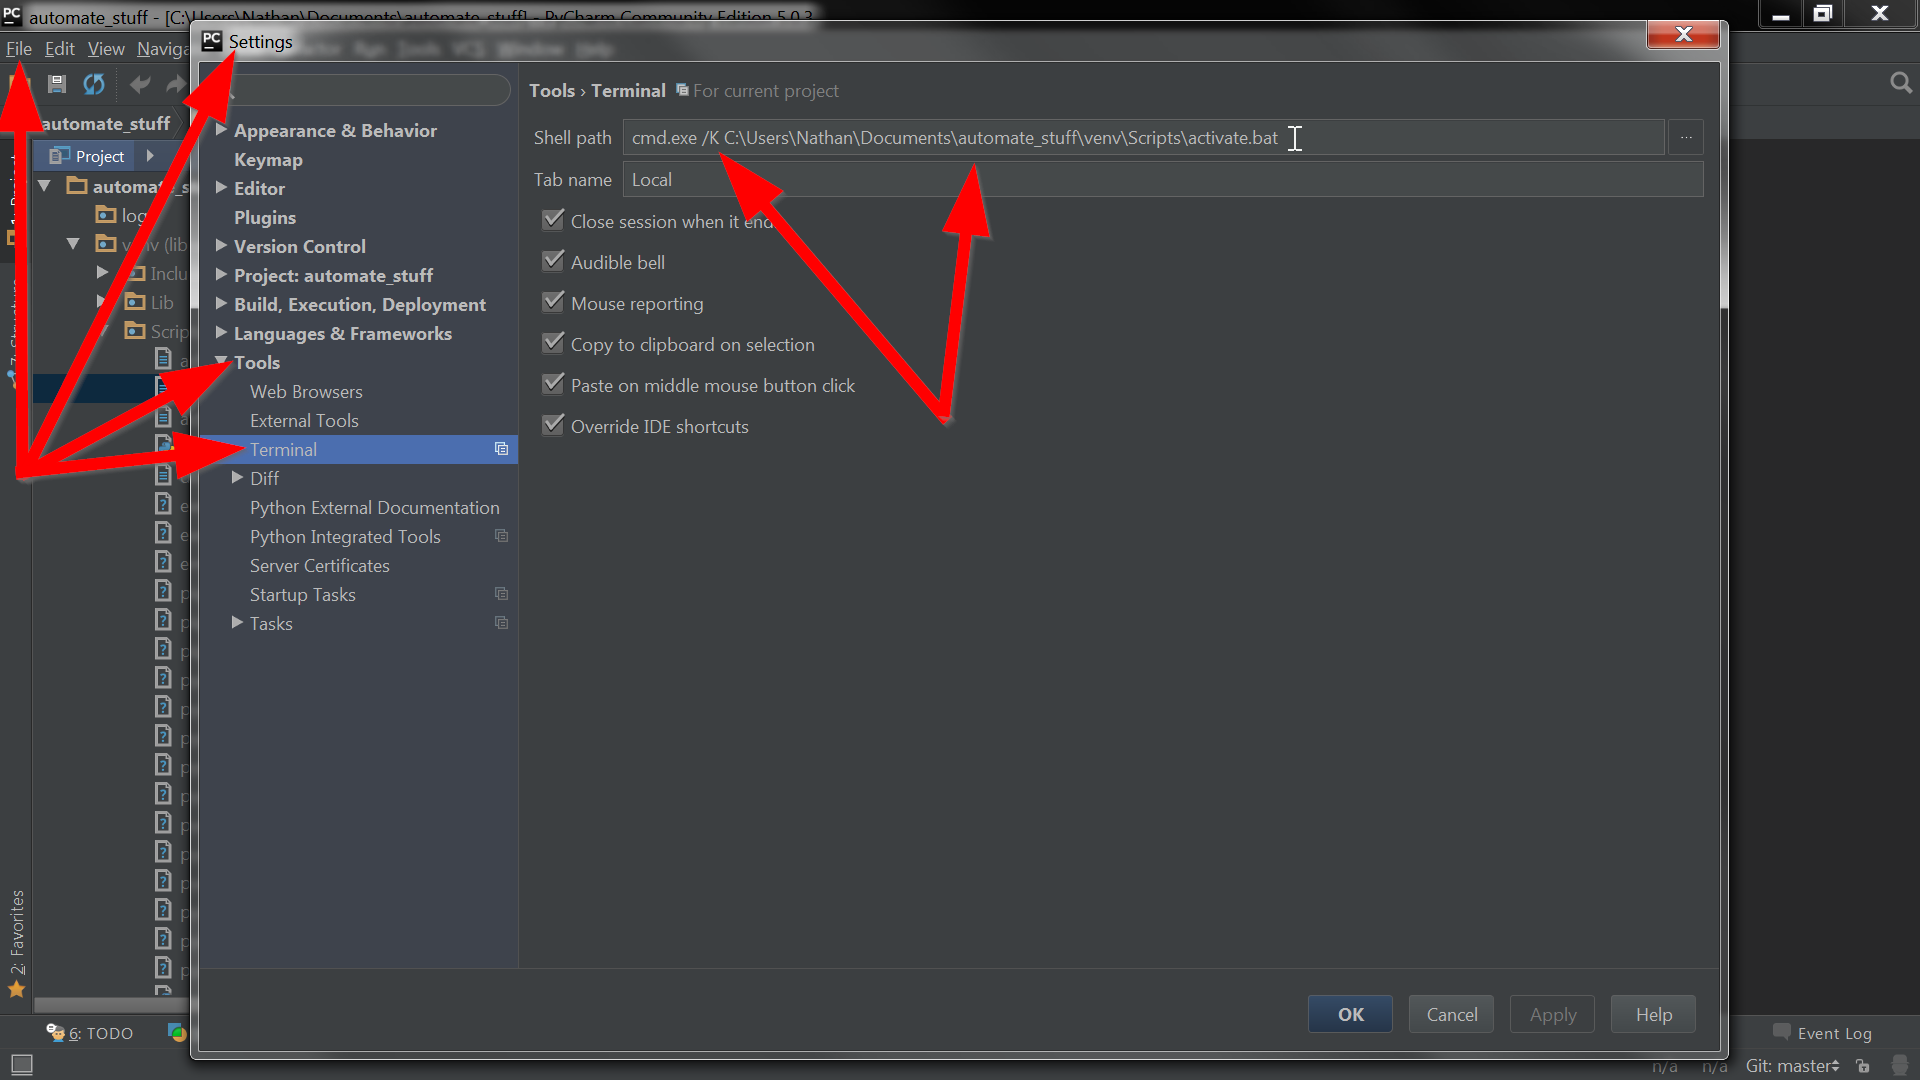
- Restart PyCharm.
- Start a Terminal session and you should see the name of your virtualenv in parentheses on the command line. Running 'python' should start the version of python that you set earlier.

- On the left-side folder-view pane, navigate to 'your_project/venv/Scripts/activate.bat', right-click the file, and select 'Copy Path'.
- Start a Terminal session and run 'pip freeze > requirements.txt'. (Source)

- (As you can see in the screenshot, it may prompt you to upgrade pip first.)
- The file should appear, and when you open it it should have a list of packages and their versions.

- Set up PyCharm to start the virtualenv every time you start a Terminal session.
- If you switch back to SourceTree you should see a list of files that SourceTree has noticed as being new.


- Ignore the '.idea/' folder and the 'venv' folder.
- We don't want to have our PyCharm files in the git repository (I think), so navigate to 'Actions' → 'Ignore'

- Select 'Ignore everything beneath: .idea'

- Once that's done those '.idea' files should disappear from the list of Unstaged files.
- Also ignore the virtualenv folder. These instructions were created before I knew that.
- Select the box next to 'Unstaged files' to select the remaining files to be committed.
- (Note: Don't commit virtualenv folder/files to your repository; instead add them to the .gitignore file. These instructions were created before I knew that.)


- Click the 'Commit' button.


- Open a bash console and switch into the project folder.
- Run 'git pull'.


- You can find instructions here...
- ...but in short, run Run this command: (Source)
mkvirtualenv name_of_your_virtualenv --python=/usr/bin/python3.5.1
- Name the virtualenv after your project, because the command to activate it has global scope (is that the way to describe it?), so you can't name all the virtualenvs "venv"; you'll have a name conflict.
- (Tangent: You'll activate the virtualenv with "workon name_of_your_virtualenv")
- Explanation:
- We're doing this so that we can have the PythonAnywhere virtualenv download the necessary packages.
- Step-by-step instructions: (You can find official instructions here.)
- Set up PyCharm to start the virtualenv every time you start a Terminal session.
- On the left-side folder-view pane, navigate to 'your_project/venv/Scripts/activate.bat', right-click the file, and select 'Copy Path'.
- Go to File → Settings → Terminal → 'Shell path' and add "/K path/to/activate.bat" after the "cmd.exe".
- Restart PyCharm.
- Start a Terminal session and you should see the name of your virtualenv in parentheses on the command line. Running 'python' should start the version of python that you set earlier.

- On the left-side folder-view pane, navigate to 'your_project/venv/Scripts/activate.bat', right-click the file, and select 'Copy Path'.
- Create a new file in the root of your project called 'requirements.txt'. Go to 'File' → 'Settings' → 'Tools' → 'Python Integrated Tools'.


